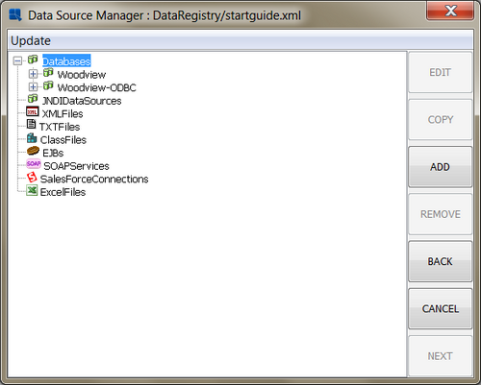
The first data source to set up is a database. EspressChart comes with two sample databases. One is HSQL which is a pure Java application database. The other is a MS Access Database. Both contain the same data.
Start Chart Designer and open your data registry again. From the Data Source Manager, click on the Databases note in the left-hand frame, and click the button. A dialog will then appear prompting you to enter the connection information for the new database. Enter Woodview as the name of the Database, enter jdbc:hsqldb:help/examples/DataSources/database/woodview for the URL, and enter org.hsqldb.jdbcDriver as the driver. Click on both the Require Login and Save Password boxes. Then enter sa for the user name and leave the password blank.
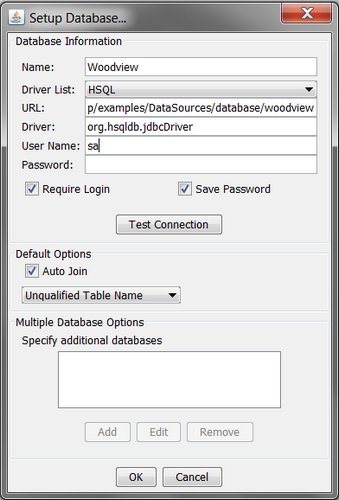
Setup Database dialog
Leave the auto-join and table name properties alone and click the button to make sure you've entered the information correctly. Then click to bring back up the data source manager window, where there will be a new node under Databases for Woodview.
If you're running on Windows, then you can use JDBC-ODBC bridge to connect to the sample MS Access database that is included in the installation. Before setting up this database as a data source in EspressChart, you must first set up the database as an ODBC data source in your Windows environment. To do this, launch the ODBC Data Source Administrator from the Windows control panel. Then add a user or system DSN. Select Microsoft Access as the database driver and specify the data source name as Woodview. Then click the button under Database. Browse to the Woodview.mdb file found in the EspressChart installation under help\examples\DataSources\database. Select this file. You should now see a new entry under the System DSN or User DSN tab called Woodview.
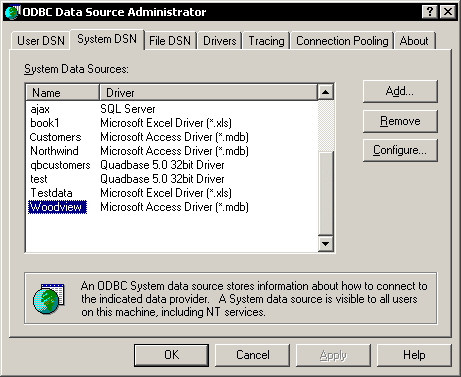
ODBC Data Source Administrator
Once you have properly set up the DSN for Woodview go back to the Data Source Manager. Click on the Databases node in the left-hand frame and click the button. A dialog will then appear prompting you to enter the connection information for the new database. If you are using Sun's JVM (i.e. JRE 1.5 or similar) then the default driver supplied in the dialog will work. Enter WoodviewODBC as the name of the database, and enter jdbc:odbc:Woodview for the URL. Click on both the Require Login and Save Password boxes. Then enter admin for both the user name and password.
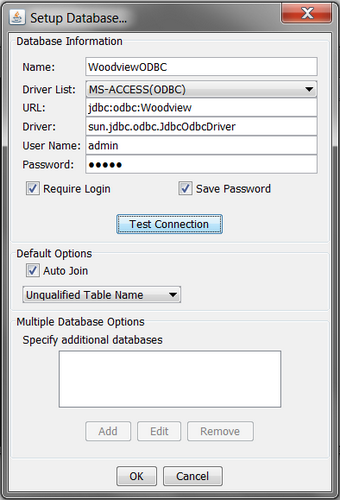
Setup Database dialog
Leave the auto-join and table name properties alone and click the button to make sure you've entered the information correctly. Then click to bring back up the data source manager window, where there will be a new node under Databases for WoodviewODBC.
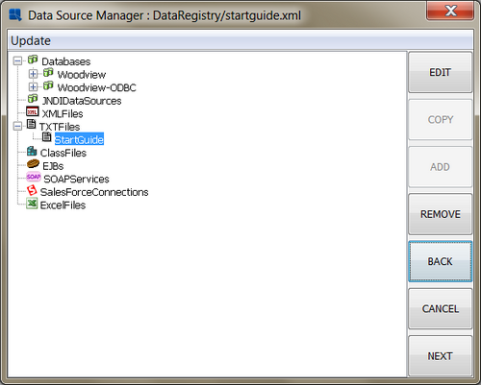
To add a text data source, click on the TXTFiles node in the left-hand frame of the Data Source Manager and click . A dialog will appear prompting you to specify a display name for the data source and the location of the text file. Enter any name you would like and then press the button. Browse to help/examples/DataSources/text/ and select StartGuide.txt.
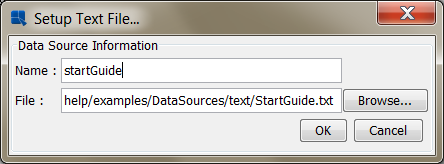
Data Source Manager
Clicking will bring back up the Data Source Manager where you will see a new node under TXTFiles for the text data source that you have just entered.
There is an additional sample text file under help/examples/DataSources/text/ called Sample.dat. This expanded sample file contains data for each data type. You can use this file to explore the different chart types and options.
