There are four versions of the EspressChart installer, one for Windows, one for Unix, one for Mac OS X, and a Pure Java version. Although EspressChart itself is pure Java, the different versions make it easy to install EspressChart on the platform of your choice.
- Windows Version
To start the Windows installer, run the
installEC.exefile and the installer will launch.- Unix Version
To start the Unix installer, run the
installEC.binfile and the installer will launch.- Mac OS X Version
To start the Mac installer, double click the
InstallEC.zipfile to extract theInstallEC.appfile. Double-click onInstallEC.app, and the installer will launch.- Pure Java Version
To start the pure Java installer, a Java Virtual Machine, the equivalent of Java 1.8 or higher, must already be installed on the machine where EspressChart is to be installed. Make sure that the JVM is included in your path (or move the
installEC.jarfile to the same directory as the JVM). From a command prompt navigate to the directory where you have placed theinstallEC.jarfile, and type the following command:java -jar installEC.jar. The installer will then launch.
Once the installation program has launched and you agree to the license agreement, the first option asks you to specify the directory into which you would like to install EspressChart.
The default location is \EspressChart\. You can specify a new directory or browse to one by clicking the button.
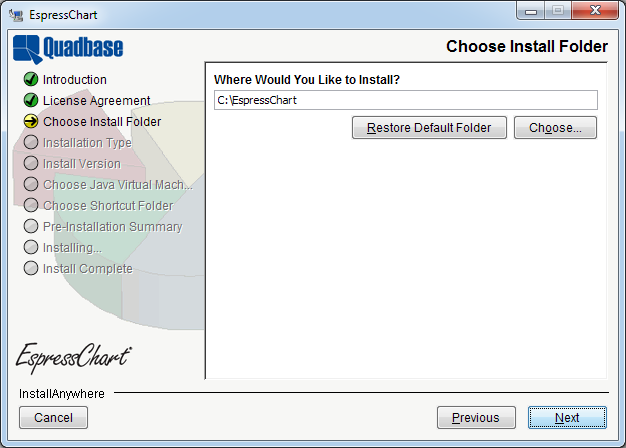
Choose Location Dialog
Once you choose the installation directory, the next option asks you whether you want to install the evaluation or licensed version.
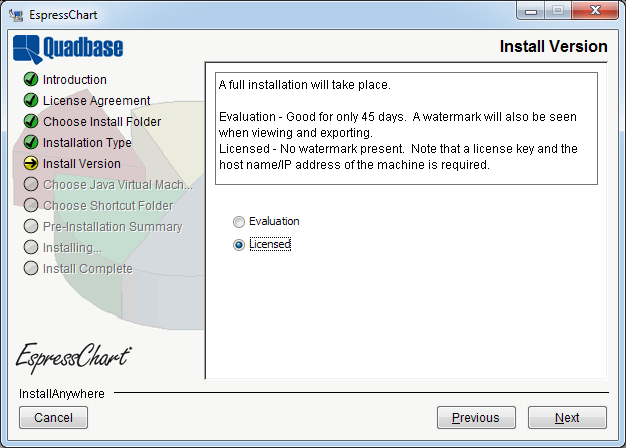
Install Version Dialog
If you select to install a licensed version, the next dialog will prompt you to enter your license key and verify the host name of the machine on which you're installing EspressChart.
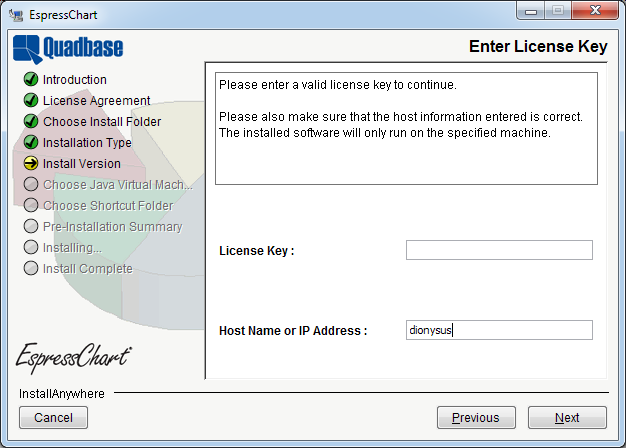
Enter License Key Dialog
After you enter all informations, the installer will attempt to register your license key with Quadbase. If the registration fails, you will be unable to install the release version of EspressChart. However, you will still be able to install the evaluation version. After the installation is complete, you can register your key online at https://www.quadbase.com/register/, or contact Quadbase Sales for additional help.
![[Note]](../../../images/note.png) | Note |
|---|---|
After the installation is complete, the release version will only run for the hostname specified in this dialog, so double-check it to make sure it's correct. You can also use the IP address of the machine if you prefer. |
The next window allows you to specify which Java Virtual Machine version should be used to run EspressChart. (Since it is a Java program, you will need JVM to run it.)
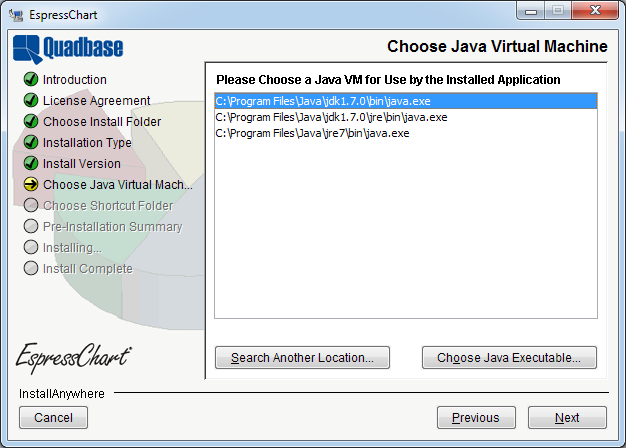
Choose JVM Dialog
The dialog prompts you to select which Java Virtual Machine you want to use. A list of compatible JVMs on the system will be displayed, allowing you to pick one. If the JVM you want to use is not listed, you can click the button to browse to it. When using the windows installer, you can also choose to install the JVM bundled with the installer, if a compatible JVM has not been found.
| Note |
|---|---|
The JVM that is bundled with the installer only provides Java Runtime Environment. In order to develop and execute Java code using the EspressChart API, you will need to have Java Development Kit and/or compiler/IDE. Also, if you're using pure Java or Mac OS X version of the installer, this option will not appear. Make sure that you're running the installer with the JVM you wish to run the program. |
The last option in the installer is for Windows or Mac OS X version of the installer. It allows you to specify the location of program shortcuts. By default the shortcuts are added to a program group called EspressChart in the Start Menu.
For Mac OS X, you can create aliases on desktop, in dock, or in a folder of your choice.
After you complete the last option, you will be shown a summary of all the options you've selected. Click the button and the program will install.