Once you have finished customizing the chart, you can save the chart definition by selecting → . This will bring up a dialog prompting you to specify the file name as well as several other save options.
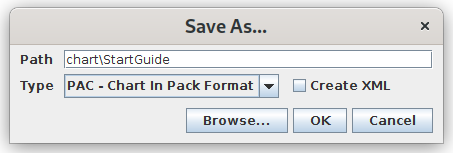
Select to save the chart in CHT format and specify a file name for the chart. This will save the chart with its data in the root directory. You can specify a different location if you like.
Once you have saved the chart, you can export it by clicking the Export button on the toolbar:![]() . This will bring up a dialog prompting you to specify export options for the chart.
. This will bring up a dialog prompting you to specify export options for the chart.
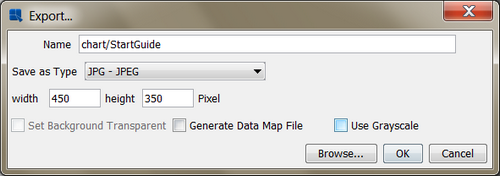
Specify a name for the generated image file and select JPEG as the export format. Click and you will be prompted to specify the image quality for the generated image.
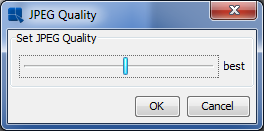
Specify the maximum quality and click the button. A JPEG file will be written in the root directory of the installation. You can preview the image by opening the generated file in your Web browser.

Now you've covered some of the basic functionality of the Chart Designer. Please see the User's Guide for more detail on any of the features discussed in this guide.