Often you may need to move dashboards from one location to another. For example dashboards may move between the server and the develop machine. On the develop machine the reports/charts/maps locations can change and may not be located from the data stored in the dashboard .dsb file. Therefore, EDAB uses the DPAK files to move or archive dashboards along with it's components. To learn how to create a DPAK file, see the Section 2.1.4.4 - Dashboard and Map Packages.
![[Note]](../../../images/note.png) | Note |
|---|---|
The DPAK files can be viewed in Published Files, but they can't be open in the Dashboard Builder. To edit a dashboard from a DPAK file, you have to unpack it first (to learn how to unpack a DPAK file, see the Section 2.1.4.4 - Dashboard and Map Packages). |
DPAK files can't be created in EDAB version 6.3 and older. If you want to move a dashboard from an old EDAB version (6.3 or older) to a new EDAB version (6.6 or newer), you will have to use the “Dasboard Migration” feature.
To use this feature, you will need to copy the following files from source EDAB server to the corresponding files on the destined EDAB server :
dashboard file from <InstallDirectory>/DashboardFiles
report files from <InstallDirectory>/ReportFiles (can be a stand-alone report or behave as a drilldown target)
chart files from <InstallDirectory>/ChartFiles (can be a stand-alone chart or behave as a drilldown target)
drilldown reports/charts from <InstallDirectory>/DrillDown (for drilldown templates that were created in the drilldown wizard)
charts embedded in reports from <InstallDirectory>/chart
map files from <InstallDirectory>/MapFiles with all the files used by this map (i.e. Coordinates file, Tooltip template and DrillDown template for Google Maps or SVG Image and DrillDown template for SVG Maps). If you are not sure about what files are used by your map, you can view the map file and search for filenames. Map files are XML files, so they are human-readable. Please note that all the files used by your map should be copied in the same subdirectories of the EDAB installation directory on the destinated EDAB server. Otherwise, you will have change the file links in the map file manually.
necessary images which are used in dashboard, but not available from the destined machine
![[Note]](../../../images/note.png) | Note |
|---|---|
The directories that are mentioned in the above list are the default directories that are used for saving certain file types. If you saved a template to a different directory or if you inserted some files into Organizer from a custom directory, you will have to search for the files in their original locations. |
Next, you will need to add previously mentioned files to the destined Organizer and then launch the dashboard builder.
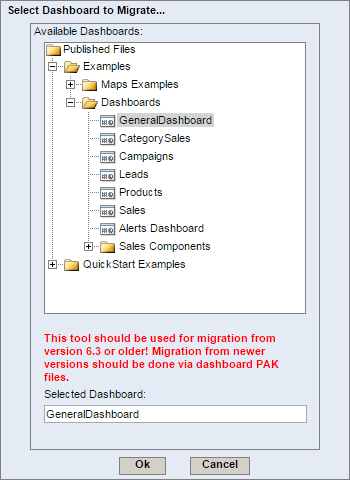
To migrate a dashboard from the Dashboard Builder, click the button on the Dashboard Builder toolbar. After you have clicked the button, the following dialog will then appear.

Dashboard migration dialog
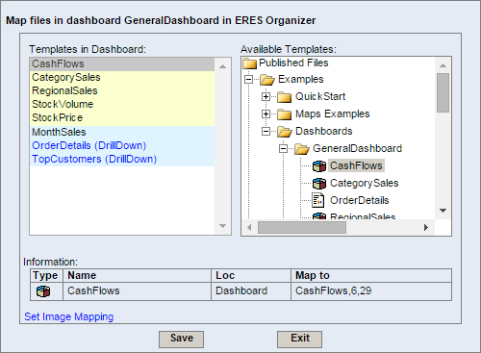
The dialog contains a tree that mirrors the folder structure in the Organizer. All of the dashboards to which you have access are listed. In order to select a dashboard to migrate, simply select it in the tree and click . The migration mapping dialog will then appear.
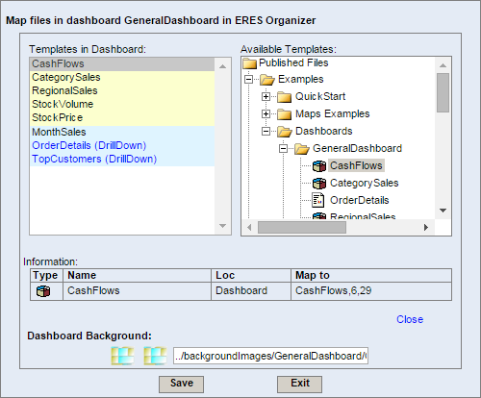
From this dialog you can map the original reports/charts/maps to the reports/charts/maps in the destined Organizer. Please note when your dashboard uses images (dashboard background, shared param panels background, shared param value list button icons, etc.), which are not available from the destined machine, you need to set image mapping as well. To set the image mapping click link at bottom of the dialog. The dialog will then extend to allow you specifying/changing the image mapping.
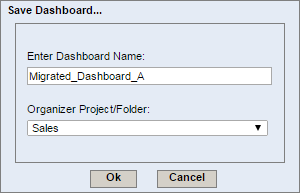
All the images that were used in the original dashboard will be listed with their URLs. You can see the preview of the original (the first image) and current mapped image (the second image). If an image is not correctly mapped, the second preview image will be blank. Once you have finished specifying the mapping for the dashboard files/images click . It will open the following dialog prompting you to enter the name for the migrated dashboard.

Dashboard migration dialog
Once you have finished specifying the options click and the dashboard will then be saved.

