There are many important installation and configuration options available in EDAB, so it is important to reference this section of documentation as you're starting out.
There are four versions of the installation program, one for Windows 7/Vista/XP/2003/NT/2000, one for Solaris/Unix, one for Mac OS X, and a pure Java version.
- Windows NT/2000/XP/2003/Vista/7:
To start the Windows installer, run the
installEDAB.exefile and the installer will launch.- Unix/Linux:
To start the Solaris/Unix installer, execute the
installEDAB.binfile, and the installer will launch.- Mac OS X:
To start the Mac installer, double click the
InstallEDAB.zipfile to extract theInstallEDAB.appfile. Double-click onInstallEDAB.app, and the installer will launch.- Pure Java:
To start the pure Java installer, a Java Development Kit, the equivalent of Java 1.5 or higher, must already be installed on the machine where EDAB is to be installed. Make sure that the JDK is included in your path (or move the
installEDAB.jarfile to the same directory as the JDK). From a command prompt navigate to the directory where you have placed theinstallEDAB.jarfile, and type the following command:java -jar installEDAB.jar. The installer will then launch.
Each installer also comes with a console install mode where there is no graphical interface and the steps are performed through a terminal/console window. To launch any installer in console mode, add -i console to the end of the command. For example, for the Unix installer, you can execute the following command to run in silent mode: ./installEDAB.bin -i console
Once the installation program has launched and you agree to the license agreement, the first option that is presented asks you to specify the directory into which you would like to install EDAB.
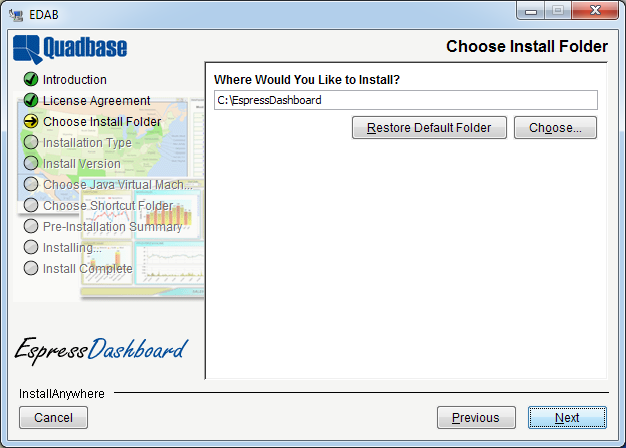
Choose EDAB Location Dialog
If the directory already exists and contains an installation of EDAB, the installer will give you the option to perform a full or update install. If the directory doesn't contain EDAB, the installation will always be a full install. For more information about update installs please see Section 1.3.1.1 - Re-Install/Update.

Install Type Dialog
For full installs, the next step will ask you whether you would like to install the evaluation or release version. The evaluation version is fully functional. However, there will be a water mark on any report, chart, map, and dashboard and the license will expire in 45 days. For update installs, it will always use an evaluation license. Please visit http://www.quadbase.com/register/ to get the full license.
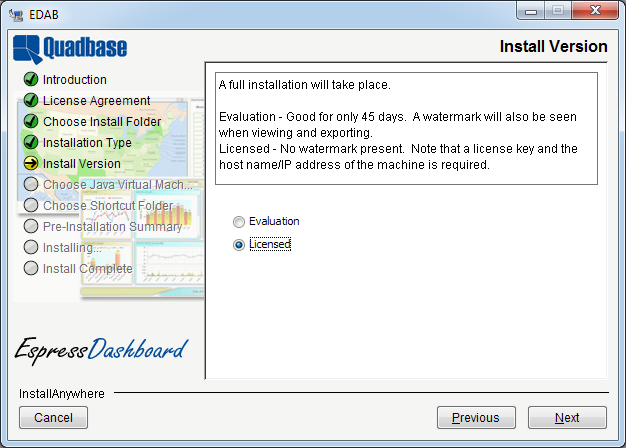
Install Version Dialog
If you elect to install a release version, then the next dialog will prompt you to enter your license key, and verify the host name of the machine on which you're installing EDAB.
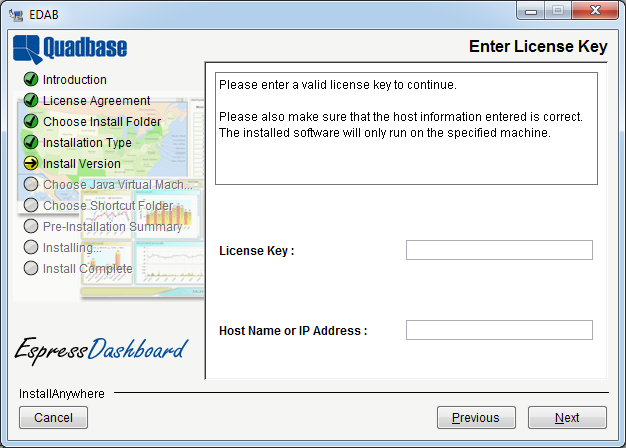
Enter License Key Dialog
After you have entered the information, the installer will attempt to register the license key with Quadbase. If registration fails, you will be unable to continue installing the release version of EDAB. You will have the option to continue installing the evaluation version. After the installation completes, you can register your key online at http://www.quadbase.com/register/, or contact Quadbase Sales for additional help.
![[Note]](../../../images/note.png) | Note |
|---|---|
After the installation completes, the release version will only run for the hostname specified in this dialog, so double-check to make sure the host name is correct. You can also use the IP address of the machine if you prefer. |
The next option that is presented is whether to install Tomcat with EDAB or not. As described in the previous chapter, the EDAB Server deploys as a servlet collection in an application server/servlet container. For out-of-the box functionality, you can install the Apache Tomcat server with EDAB already deployed. If you are installing EDAB for the first time, or evaluating the product, it is recommended that you select this option.
If you elect to install without Tomcat then the EDAB files will be installed in your system, and you will need to manually deploy it within your application server. Instructions for different server platforms are in Section 8.3 - Using Other Application Servers.
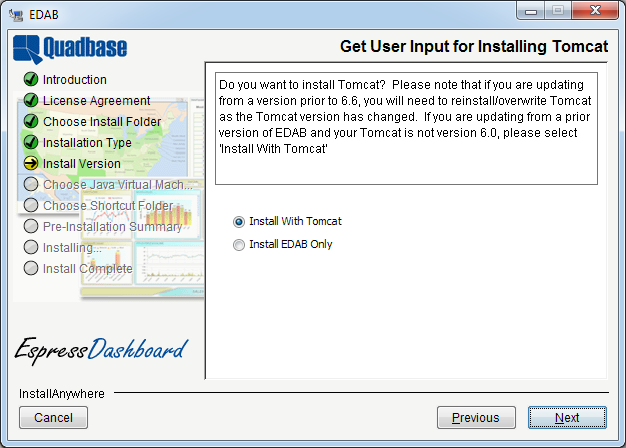
Use Tomcat Dialog
The next dialog prompts you to select the directory into which you would like to install Tomcat. If you elect not to install Tomcat this option will be skipped. Tomcat and EDAB will be installed in different directories on the system, and the EDAB directory will be mapped as a virtual directory in Tomcat.
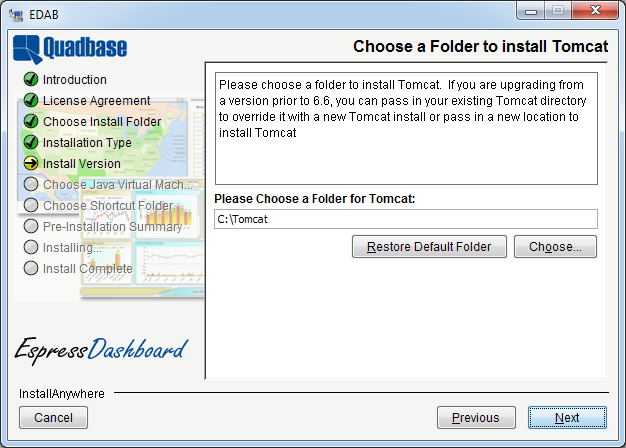
Choose Tomcat Location Dialog
The next dialog prompts you to specify the connection options for the application server. This dialog appears whether you choose to install EDAB with Tomcat or not. You will need to specify the machine name or IP address, the port number, and the context for the application server on which EDAB will be running.
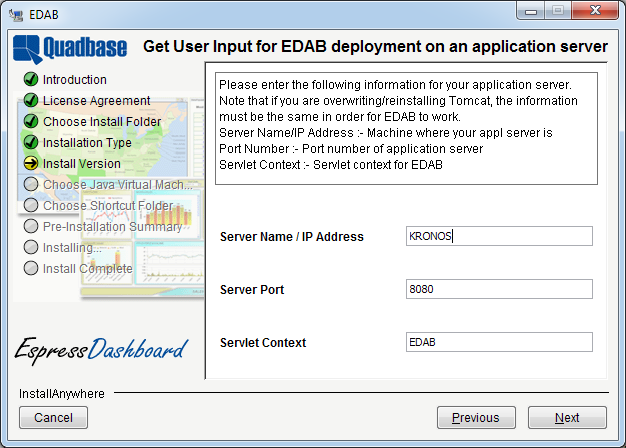
Choose Tomcat Settings Dialog
After specifying the connection details for the application server, the next dialog asks you to choose whether to auto start the EDAB Server, i.e., have the EDAB Server running whenever the application server is started.
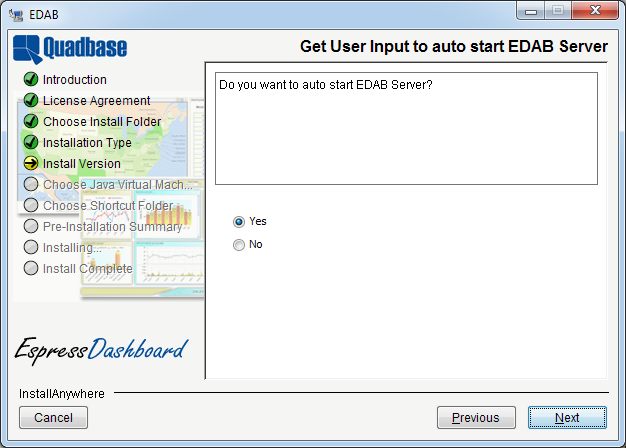
Autostart EDAB Server
The next dialog asks you to choose the protocol you wish to use to access EDAB, i.e., do you wish to use http:// or https://?
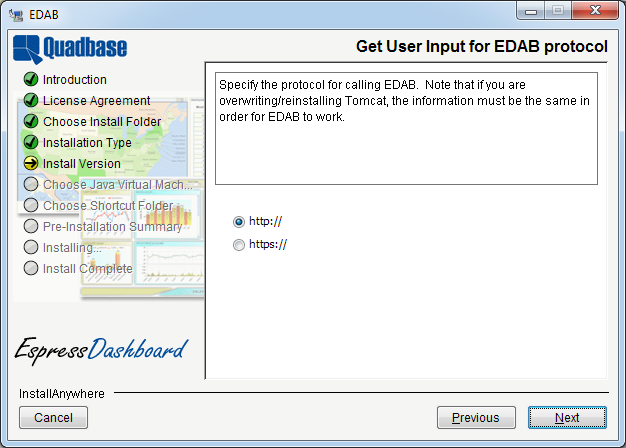
Specify Protocol for EDAB
If you choose https:// protocol and have selected to install Tomcat, the following two dialogs will appear. Note that if you have chosen not to install Tomcat, you are responsible for setting the https connection details and setting up the certificate.
The next dialog allows you to install Tomcat as a Windows service.
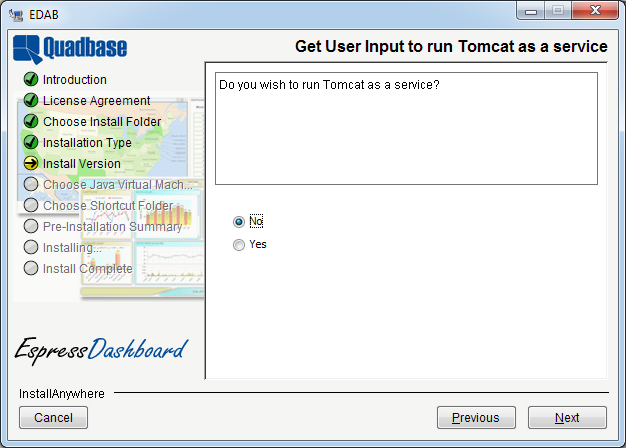
Install Tomcat as a service
If you choose to install Tomcat as a service, the next dialog will prompt you to select whether the service should start automatically when the machine is started.
The next dialog appears when the option to install Tomcat and the https:// protocol is selected. This dialog obtains information to generate a generic SSL certificate for the installed Tomcat to use.
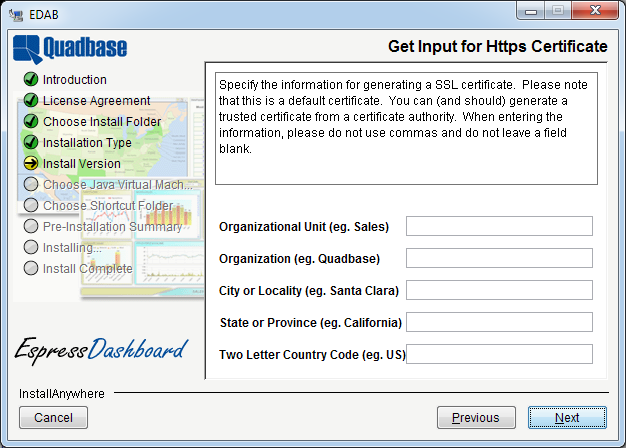
Specify User and Organization Information
For this dialog, you cannot leave any information blank nor can you use a comma. If either of the two happens or if the two letter country code is not two characters in length, a error message is shown and you will be prompted to enter the information again.
The next dialog prompts you to select which Java Virtual Machine you would like EDAB to use. A list of JVMs on the system are displayed allowing you to pick one. If the JVM you would like to use is not listed, you can click the button to browse to it. The Windows platform installer also provides an additional choice of installing the bundled JVM.
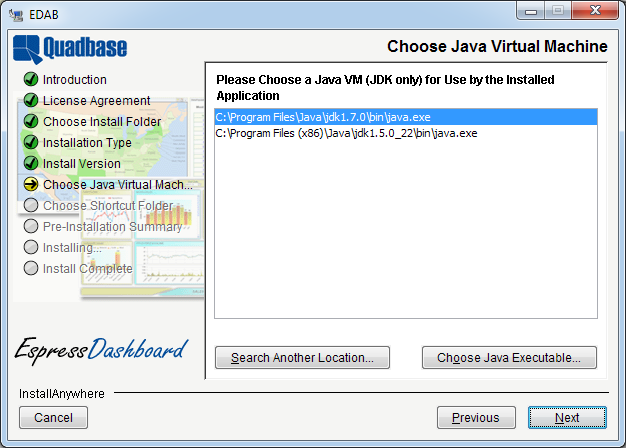
Choose JVM Dialog
| Note |
|---|---|
The JVM specified here is only used for running Organizer as an application and for running Tomcat (if you choose to install EDAB with Tomcat). EDAB uses your Web browser's Java plug-in for applet components. Note that you must select a JDK at this panel. If you choose a non-JDK, an error message is shown and you will be prompted to enter the information again. |
The last option in the installer is only available for the Windows Vista/XP/NT/2000 installation. It allows you to specify where to create the program shortcuts in the Start Menu, on the Desktop, or both. Note that shortcuts will only be created if you elect to install Tomcat.
After you complete the last option you will be shown a summary of the options you've selected. Next, the program will install.
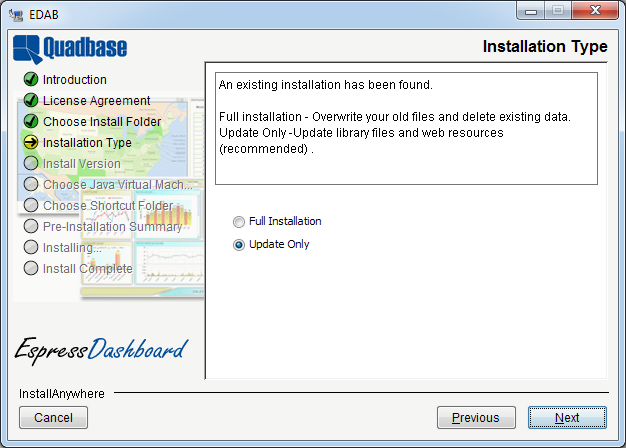
If you select a destination directory for the EDAB files that already contains an EDAB installation, you will be prompted as to whether you would like to update your existing installation, or create a new one.
Install Type Dialog
If you select to create a new installation, then the entire existing installation will be overwritten (and all settings will be re-set to default values). If you select this option and click the button, the installation wizard will continue as if you were installing EDAB for the first time (as described in the previous chapter).
If you select to update the current EDAB installation, only program files will be updated (thus enabling new EDAB features and fixing corrupted files), but all EDAB settings and the EDAB database will be kept as they are (i.e. with your current settings).
If you select to install an update and you are updating from a version prior to 6.6 (in other words: you are not re-installing an existing EDAB 6.6 installation), you will be prompted whether you want to install EDAB with bundled Tomcat 6.0. Please note that EDAB 6.6 requires Tomcat version 6.0 or higher. EDAB versions prior to 6.6 were distributed with Tomcat version 5 and lower, so if you are currently using EDAB 6.3 or lower with bundled Tomcat, you will need to install EDAB 6.6 with Tomcat, or update your Tomcat manually (not recommended). If you're just re-installing EDAB 6.6, this step will be skipped, Tomcat will not be installed, and your deployment configuration will not be changed.

Install Tomcat Dialog
If you chose to install EDAB with Tomcat 6.0, the next step will be to select a directory for Tomcat. If you choose a directory that doesn't contain an existing Tomcat installation and click (recommended), you will be taken straight to the Tomcat configuration wizard step (as described in the previous chapter).
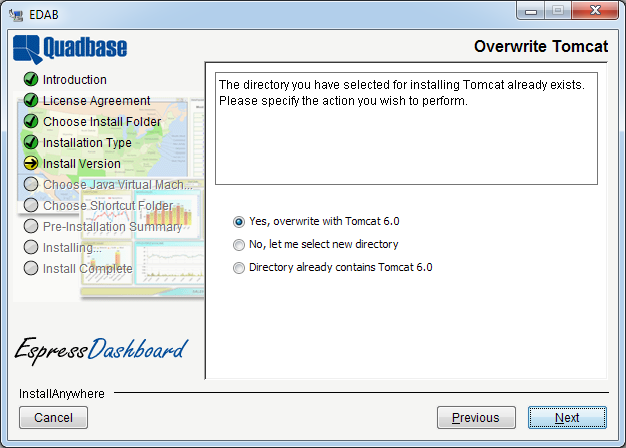
If you choose a directory that contains a Tomcat installation already, the following dialog will appear giving you three options: to overwrite the existing Tomcat installation with a new one, to go back to the previous step, or to tell EDAB to assume that the directory already contains Tomcat version 6.0 or higher.
![[Tip]](../../../images/tip.png) | Tip |
|---|---|
If you want to use an an existing Tomcat 6.0 installation for running EDAB, select the existing Tomcat installation directory and then select the Directory already contains Tomcat 6.0 option. |
Install Version Dialog
If you are upgrading from a previous version of EDAB, make sure to follow the steps in Section 1.3.2.1.3 - Upgrading EDAB Database from previous version of EDAB to update your existing EDAB database.
After you have completed the installation of EDAB there are several configuration options available.
Information about users and groups, files in the Organizer, and security/privilege information is stored in a database. By default this is the HSQL Java application database which is included in the EDAB installation. Connection to this database is transparent to users and will work out of the box. This database works fine for development or evaluation environments, however, it is generally insufficient for production environments, as it will not scale to large deployments and provides no failure/recovery features.
EDAB provides users the option of using a different database than the HSQL database provided with the installation. To run with a different database, you will need to create the tables used by EDAB in your database. Create table scripts are provided in the EDAB installation in the data directory, and are available for most major databases.
The database connection that the EDAB server uses to connect to the database is specified in the , under → . You can change the connection information to provide a JDBC connection to the database that you would like to use. The JDBC driver for the database you're using will need to be added/available to the classpath of the application server/servlet container where you have deployed EDAB. You can also make a connection to the EDAB database using JNDI. You can pass in the JNDI connection details after pointing your application server to the EDAB database.
Specific setup instructions for different databases are available in Section 8.1 - Using Other Databases.
Normally the HSQL database runs as an application process on the server-side and needs no user interaction to start or stop the database process. HSQL can also be run in client-server mode. This mode can improve performance and scalability for the database when run in a multi-user environment. To run the HSQL database in client-server mode, open a console window and navigate to the /data/ directory of your EDAB installation. In this directory run the following command:
java -classpath "../WEB-INF/lib/hsqldb.jar" org.hsqldb.Server -database quadbasedb -port 2857 (or whatever port you would like the database to listen on)
The database server process will then start. To configure the EDAB Server to connect to HSQL running in this mode, log on as Admin and enter the → → and change the entry in Database URL to read jdbc:hsqldb:hsql://machinename:port where machinename is the name or IP address of the server, and the port number is the port you selected for the HSQL server.
In order to support new features, the EDAB database structure generally needs to be modified.
If you are running the EDAB database on HSQL, MySQL, Oracle, MS-SQL, Informix or Postgres database, the database will be updated automatically during the EDAB installation process.
If you are using a different database, you need to run the upgrade program before you can start using the latest version of EDAB. The upgrade programs are located in the <EDAB-INSTALL>/data/dbupgrade directory.
Currently, the upgrade programs support MS-ACCESS and DB2 databases (besides the six databases that are also supported by the EDAB installer). If your database is not in the above list, please contact our technical support staff for more details.
There are two versions of upgrade programs, namely, DBUpgradeGUI and UpgradeAppl.
The former is the graphic user interface version, the latter the command line version.
Please note that EDAB log records are not preserved during the upgrade process.
![[Warning]](../../../images/warning.png) | Warning |
|---|---|
As a precaution, you are recommended to backup your EDAB database before you proceed with the upgrade. This is to safeguard the unlikely event that any abnormal situation may occur during the upgrade process. |
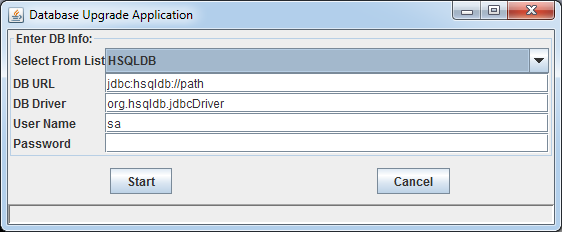
Upgrade User Repository Database Using Graphic Interface
Change directory to
<EDAB-INSTALL>/data/dbupgrade/Enter command:
java -classpath "<DB_Driver>;DBUpgrade.jar;.;" quadbase.DBUpgradeGUI
The upgrade program graphic interface is shown below:
Upgrade DB Program GUI
You need to specify the database information so that the program can proceed to do the upgrade.
Please note that the default database connection information is provided only as a guideline, you need to fill in the exact connection information for the upgrade program to run. Also, please make sure that the database driver is included in the –classpath flag in the command.
For example, if you are using Oracle, you may run the command with classpath as follows:
java -classpath "c:\EDAB\WEB-INF\lib\jdbc_oracle.jar;DBupgrade.jar;." quadbase.DBUpgradeGUI
Press the button and the upgrade process will begin.
If you entered wrong database information, the program will prompt you with an error message complaining wrong database connection settings.
After the upgrade program is finished, the status bar at the bottom of the window will show Done.
If you click the button during the upgrade process, it will terminate the upgrade program. But it will NOT roll back to the original database. In such a case, you have to use your own backup data or use the backup SQL file generated by this program to restore your database.
Upgrading EDAB Database Using Command Line:
To upgrade using the command line version, simply type the command as follows:
java -classpath "<DB_Driver>;DBUpgrade.jar;." quadbase.UpgradeAppl <EDAB_config_file>
The program will use the file specified by <EDAB_config_file> to obtain connection information. The config file should be written in the same format as the config.txt in <EDAB_INSTALL>/data/dpupgrade/.
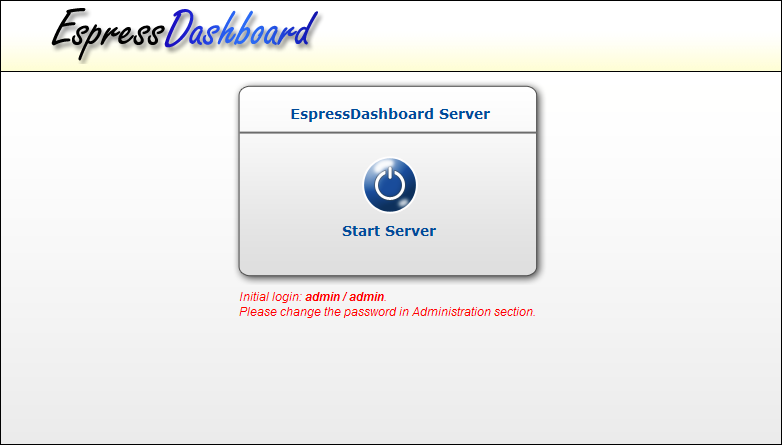
If you have selected the option to Auto-Start Server, then the EDAB Server is started the moment the application server (Tomcat by default) is started. If the option was not selected, or you change the option in the → → , then you will have to start the EDAB Server manually.
The first step in running and administering EDAB is to start the server. To start the EDAB server, you will first need to start the application server/servlet container in which the server is deployed. If you installed EDAB with Tomcat, go to the /bin/ directory of the Tomcat installation and execute startup.bat/.sh to start Tomcat.
Next, load the start page for EDAB. This is the index.jsp page in the EDAB install directory. If you installed EDAB with Tomcat then the virtual directory mapped to the EDAB install directory is /EDAB/ so to reach the index page, you would use the following URL:
http://machinename:port/EDAB/index.jsp
| Note |
|---|---|
You must have cookies and javascript enabled in your browser in order to use the EDAB interfaces. |
EDAB Start Page
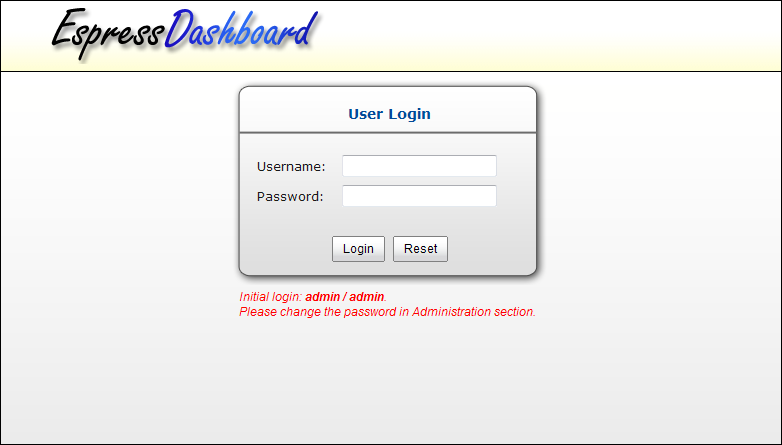
You can start the server directly in the start page. If the “Autostart” feature has been enabled (see Section 1.3.1 - Installing EDAB for more details), the EDAB server should be already running. If it's not, click the button. Once the server is started, you can log-in to access other EspressDashboard functions (the default administrator login is username: admin password: admin).
| Note |
|---|---|
Any user can start the server, but only the administrator can shut down the server. Even with the server running, the button will only become active when you login as the system administrator. |
EDAB Server Running
All applets have a maximum memory heap size of 16 megs, by default. In Windows, this can be increased by going to and selecting (or ). Click on the Java tab and then View under Java Applet Runtime Settings. Enter -Xmx128M under Java Runtime Parameters and click .
If you upgraded from an older version, you may notice some changes in the default behavior. Although the backward compatibility is kept whenever it is possible, sometimes a new behavior is preferred. The new behavior should be better for majority of users, but if you already have some charts or reports from an older version, you may want to keep the old behavior, so your charts and reports look exactly the same as before. That is why we provide backward compatibility patches.
![[Caution]](../../../images/caution.png) | Caution |
|---|---|
Patches are for advanced users only. Please apply them only if you need them and if you know what are doing. If you are not sure, contact support. |
The patches can be found in the <EDAB_Installation_Directory>/lib/Patches directory. They are stored in JAR archives. To apply a patch, it is enough to add the appropriate JAR file to the classpath of your application as described below.
If you want to apply a patch to all designers (Quick Designer, Chart Designer, Dashboard Builder, etc.) and viewers (Dashboard Viewer, etc.), you have to copy the appropriate patch JAR file to the <EDAB_INSTALLATION_DIRECTORY>/WEB-INF/lib/ directory. Then you have to edit the Organizer.jsp file in the EDAB installation directory and add relative path to the patch JAR file to the archive attribute of the applet tag.
Below is list of all patches available in the current version.
patch1.jar | - turn off chart axis padding by default
|
patch2.jar | - add left margin for annotation text in charts
|
patch3.jar | - use 0 to 1 as min, max value when chart axis autoscale for axis pt less than 1
|
patch4.jar | - turn off new pie chart label placement algorithm (calculate label placement based on pie sector position)
|
patch5.jar | - always use integer value for chart axis auto scale
|
patch6.jar | - disable minimum and maximum error check for chart axis scale
|
patch7.jar | - turn off Single color for categories feature for columnar and bar charts by defaul
|
patch8.jar | - line chart end to end revert single point data to display on left axis |
patch9.jar | - display stack label despite not having enough space in the stack to render it |