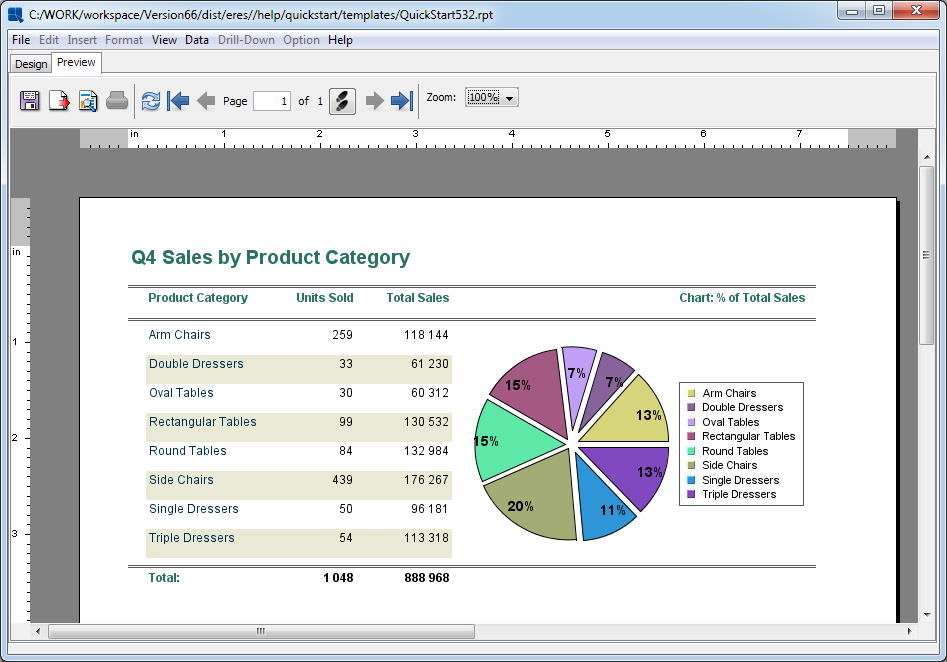
After inserting or manipulating report objects, you can view the results in the Preview window. You can switch back and forth between the Design and Preview windows by using the tabs in the upper left-hand corner of the Report Designer or by selecting Design or Preview from the View menu. The Preview window gives you an accurate picture of what the report will look like if it is printed or exported.
Preview Window
The Preview shows the page dimensions in inches or centimeters (depending on which unit is selected with the toggle button at the upper left-hand corner of the designer window where the rulers meet. The drop-down menu at the right-hand side of the toolbar allows you to set the zooming for the preview.
You can navigate around the report using the toolbar or the View menu. The toolbar buttons perform the following functions:
| Go to the first page of the report |
| Go to the previous page of the report |
| Go to a specific page (that you enter in the Page text box.) |
| Go to the next page of the report |
| Go to the last page of the report |
These navigation functions can also be performed by selecting First Page, Previous Page, Next Page, Last Page, or Go To Page... from the View menu.
Other options in the Preview window toolbar perform the following functions:
| Save the file |
| Export the file |
| Load the entire report in the page viewer window. For more on this please see Section 1.6.2.4 - Using Page Viewer. |
| Print the report (This option is unavailable if Report Designer is run as an applet |
| Refresh Data |
In addition, the File, and Data menus remain active, allowing you to manipulate the file, print, refresh data, and view column mappings.
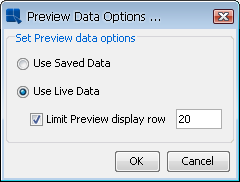
You will be presented with the data options dialog the first time you preview a report. This dialog allows you to set several options related to how the Preview window displays report data.
Preview Data Options Dialog
The first option allows you to select whether or not to use live data when previewing the report. If you select live data, the report will connect to the data source and retrieve the data every time the report is previewed. Note that if the data cannot be obtained (for example, if the database connection is down), then the preview will show an error. You will then need to reload the report (once the connection has been reestablished) or go back to the Preview Data Options and select to Use Saved Data. If you select to use saved data then the report will show whatever data it has when you preview the report. This could be the two records of back-up data that are stored in the template, the first twenty records that are retrieved when a report is first created, or the full data set from the previous preview (if the option had been set to use live data).
If you select to use live data to preview the report, a second option can be set that allows you to limit the number of records that should be retrieved from the data source. If your report uses a large data set, this option allows you to see the report with data while limiting the processing time and preserving client memory.
Once you set this option the first time a report is previewed, you will not be prompted again when you preview the report. If you want to change these settings, select Set Preview Display Options Data menu. This will bring up the dialog again, allowing you to change the preview settings.
Within the Preview window you can sort the data based on any column in the report in ascending or descending order. To do this, select ‘Sort by (ascend)’ or ‘Sort by (descend)’ from the View menu. Each option will bring up a secondary menu containing all of the report column fields. Selecting a column field will cause the report to sort by that column in either ascending or descending order. This feature is also available in the Report Viewer applet.
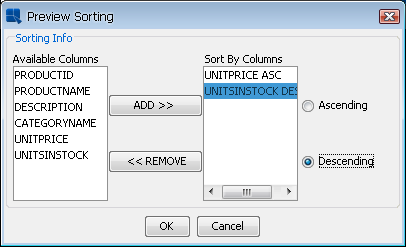
To sort by multiple columns, select Sort By... from the View menu. This will bring up a dialog allowing you to select which columns to sort by and the direction.
Preview Sorting Dialog
To sort by a column, select it in the left-hand side of the dialog and click the button. You can set the direction of the sort, by selecting the column in the right-hand side and clicking either the or button.
![[Note]](../../../images/note.png) | Note |
|---|---|
Any sorting performed will not be saved with the template. When the template is re-opened (run), the data will be in the original order. However, you can export the report after sorting and the exported file will reflect the re-ordered data. |
It is not recommended that you use this feature with reports containing a large amount of data, as this will use a large amount of memory and can compromise performance.
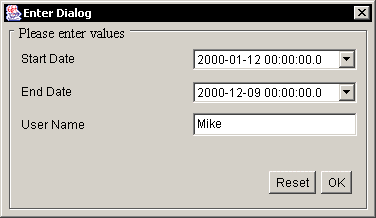
If your report uses a parameterized query or if you have defined any formula parameters in the report, you will be prompted to select parameter values when you preview the report.
Parameter Prompt Dialog
You are prompted to type in or select the parameter values depending on how the parameters are mapped. Clicking will generate the report using the specified values. You can disable parameter prompting by toggling the Preview Parameter Prompt option in the Data menu. If date variables are not mapped to a database column, the parameter prompt will appear as below, with the options of entering a date from the calendar or a date variable.
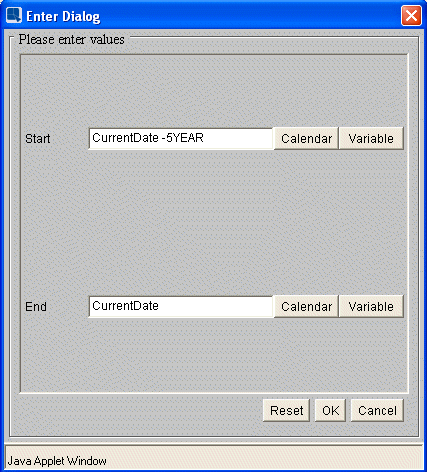
Date Parameter Prompt Dialog
For more about query parameters, see Section 1.3.2.2.2 - Parameterized Queries. For more about formula parameters, see Section 1.8.2.6 - Formula Parameters.
Generally when you preview the report, the entire report with its data is kept in memory. This allows you to quickly preview and navigate through the generated report. However, for large reports, previewing the entire report could significantly affect system performance as the entire report is loaded in memory. To prevent this problem, you can limit the number of records that are fetched during preview as detailed in Section 1.6.2.1 - Preview Data Options.
On the otherhand, when creating an ad-hoc report, you may want to preview the entire report without loading it in memory. To do this, EspressReport allows you to load the report in the Page Viewer. To do this, select Launch Page Viewer from the View menu or click the ![]() icon on the toolbar. This will open a Page Viewer window containing the report.
icon on the toolbar. This will open a Page Viewer window containing the report.
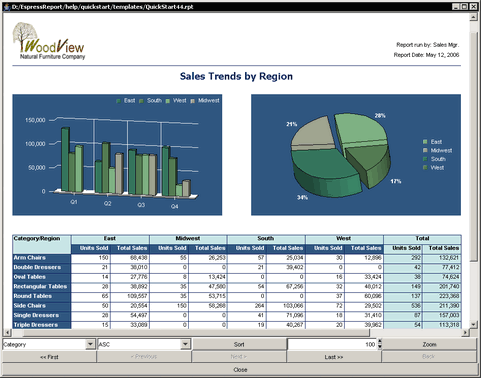
Report Shown in Page Viewer Window
The Page Viewer window will show the entire report. You can navigate around the different pages by clicking the buttons on the toolbar at the bottom of the window or by right clicking and selecting to change pages from the pop-up menu. Because the Page Viewer is a static format, the window will not automatically reflect any subsequent changes made to the report. You will need to close the window and re-launch the Page Viewer. For more information about the Page Viewer, please see Section 2.2 - Introduction to Page Viewer.
When viewing a report with unmapped drill-down parameters, clicking on the links in the main report will cause a parameter selection dialog to pop up, allowing you to fill in the unmapped parameters.
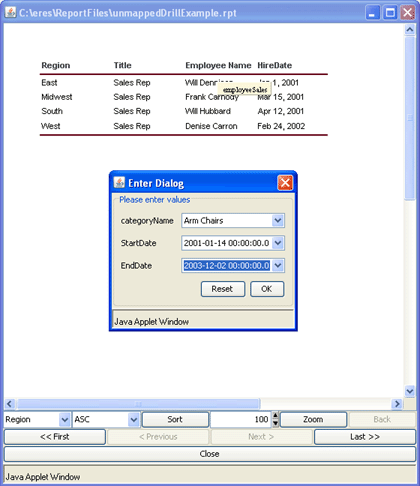
Parameter Selection Dialog
Once the values are entered, click and the drill report will be shown. To return to the previous level, click on the button in the Page Viewer toolbar.
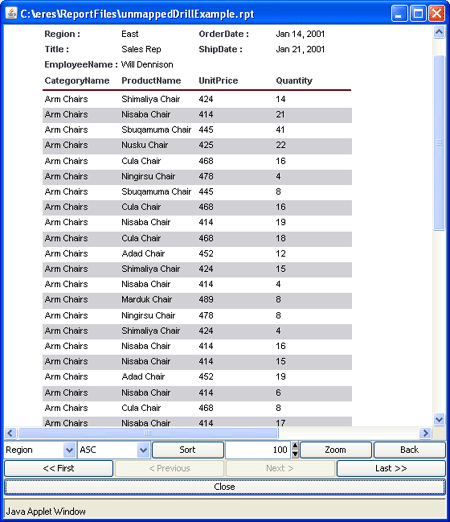
Drill-Down Level
The output you see in the Preview window is based on the page dimensions and margins that are set in the Design window. The page dimensions are marked by the rulers, with the shaded areas indicating the page margins. To adjust these properties select Page Setup from the Option menu. This will bring up a dialog box prompting you to set the page orientation (landscape or portrait), height, width, and margins. Measurements are in inches or centimeters depending on which unit is currently selected. Changing the orientation will also change the default print properties.
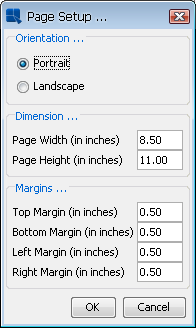
Page Properties Dialog