The Salesforce data source is designed for existing Salesforce users who want to display their Salesforce data in EspressChart. The connection to the Salesforce server is established via SOAP using Salesforce Partner WSDL (version 13.0). Users communicate with Salesforce server by SOQL (Salesforce Object Query Language) queries. Please note that users must have valid Salesforce accounts with username and password to work with this data source. Moreover, users who use the EspressChart Salesforce data source must have access to Salesforce account from trusted networks. To add your IP address to the trusted IP list, you have to activate your computer as described below.
For more information about SOQL queries and activating Salesforce user's accounts from trusted networks, please visit the following Salesforce sites:
SOQL queries
Activating Salesforce user's accounts
https://help.salesforce.com/s/articleView?id=sf.security_networkaccess.htm
To set up a Salesforce data source, select the SalesForce node in the Data Source Manager and click the button. A dialog will open prompting you to specify a display name for the data source, user name and password to your Salesforce account. Once you specify the connection information, you can test the connection to your Salesforce account by clicking the button. This will test the connection using the information you've provided and report any problems.
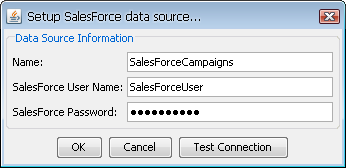
Setup SalesForce Data Source Dialog
Once you add a Salesforce data source, a new node will appear in the Data Source Manager window. To add a new Salesforce query, click the button. A new dialog will open prompting you to specify a query name and SOQL query.
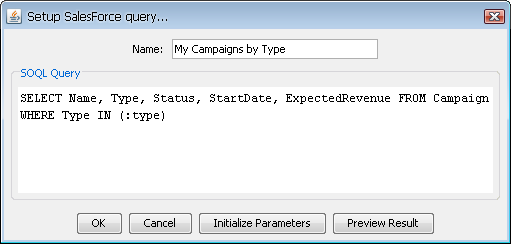
Setup SalesForce Query Dialog
Please note that only child-to-parent relationship queries are supported in the current EspressChart version. You cannot use parent-to-child queries (using nested SOQL queries). For more information about Salesforce relationship queries and their syntaxes, please visit the following Salesforce site: https://developer.salesforce.com/docs/atlas.en-us.soql_sosl.meta/soql_sosl/sforce_api_calls_soql_relationships.htm
Moreover, this dialog allows you to initialize query parameters in case that your query contains single value or multi value parameters. A parameter is specified within an SOQL statement using the ":" character. Generally the parameter is placed in WHERE clause of an SOQL Select statement. For example, the following SOQL statement
Select Name, Type, Status, ActualCost From Campaign Where Name = :CampaignName
specifies a single value parameter called CampaignName. You would then be able to enter a campaign name at run-time and only retrieve data for that campaign.
Another example of SOQL statement shows using of multi value parameters that take an array of values as the input rather than single values.
Select Name, Description, Type, LeadSource, Probability From Opportunity Where Type IN (:OpportunityType) And LeadSource IN (:OppLeadSource)
The statement specifies two multi value parameters called OpportunityType and OppLeadSource. You would then be able to specify opportunity types and lead sources at run-time and you will only retrieve data according to specified parameters values.
In order to initialize SOQL query parameters, click the button. The initialize parameters dialog will then appear allowing you to specify parameters mapping.
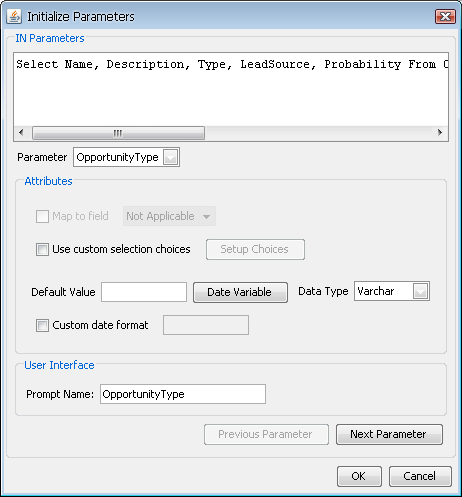
Initialize Parameters Dialog
From this dialog, you can specify the following options:
- Map to field:
This allows you to specify a field from the Salesforce data source whose values will be used for the parameter input. Selecting this option modifies the parameter prompt that you will get when previewing or running the report/chart. If you map the parameter to a Salesforce field, you will be prompted with a drop-down list of distinct values from which you can select a parameter value. If you do not map, you will have to type in specific parameter value.
- Use custom selection choices:
Rather than having a drop-down menu with all the distinct column values, you can build a custom list of parameter values. To set up the list, select this option and click the button. This will launch a new dialog allowing you to create a list of choices.
The rest of the options are basically same as for database query parameters. For further information about initializing database query parameters, see Section 4.2.2.2.2 - Initializing Query Parameters. Once you specify mapping for all available parameters, click the button and you will be taken back to the Setup Salesforce Query dialog.
From the Setup SalesForce Query dialog, you can also preview the query result using the button to verify output from your query. In case you have a parameterized query, the parameter prompt dialog will appear prompting you to specify parameter values. Once you specify the parameter values, click the button and the query result preview dialog will appear.
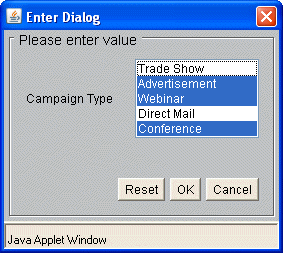
Parameter Prompt
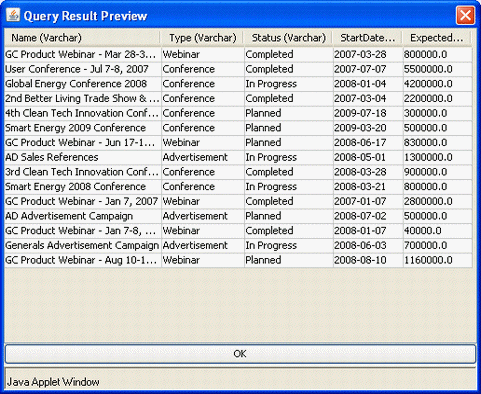
Query Result Preview Dialog
From this dialog, you can verify the query output. Clicking the button will take you back to the Setup SalesForce Query Dialog.
Once you specify the query, click the button. The query will then be added as a new node under your Salesforce data source in the Data Source Manager and can now be used to create a report or chart.