The first step in starting EDAB, is to start the application server in which it is deployed. In this case it means starting the Tomcat server that comes with the EDAB installation. To start Tomcat, execute the startup.bat/.sh files in the /bin/ directory of your Tomcat installation. If you installed EDAB on Windows, you can also start Tomcat from shortcuts in the Start Menu.
With Tomcat started successfully, you can then load the Start page for EDAB. The Start page can be loaded from the following location:
http://<machinename>:<port>/<context>/index.jsp
Replace <machinename> with your server hostname or IP address, <port> with the port and <context> with the context you specified for Tomcat during installation. The default port is 8080 and default context is EDAB. If you installed EDAB on Windows, you can launch the Start page from the Start Menu.
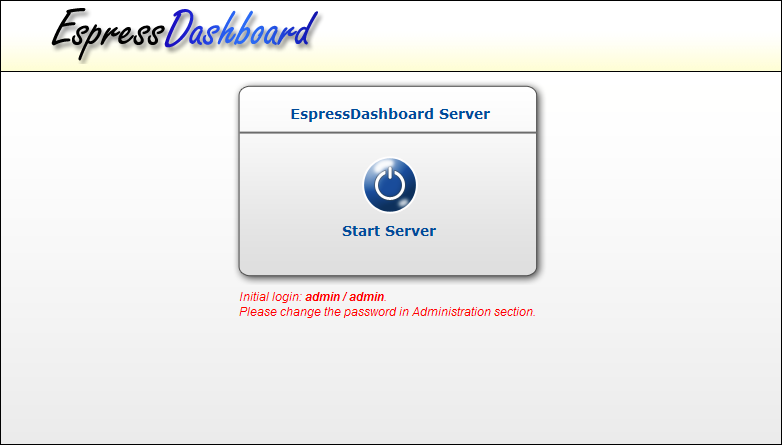
EDAB Start Page
Before we start working with EDAB, the EDAB Server needs to be running. If the “Autostart” feature has been enabled during installation process (see Section 1.3.1 - Installing EDAB for more details), the EDAB Server should be running. To check whether it is running or not, look at the EspressDashboard Server section in the upper right corner of the EDAB Main Page. If there is a icon, it means that the EDAB server is off. Click on the icon to turn it on.
The next step is to turn on the EDAB Server. You can do this in the Start page by clicking the button on the right-hand side.
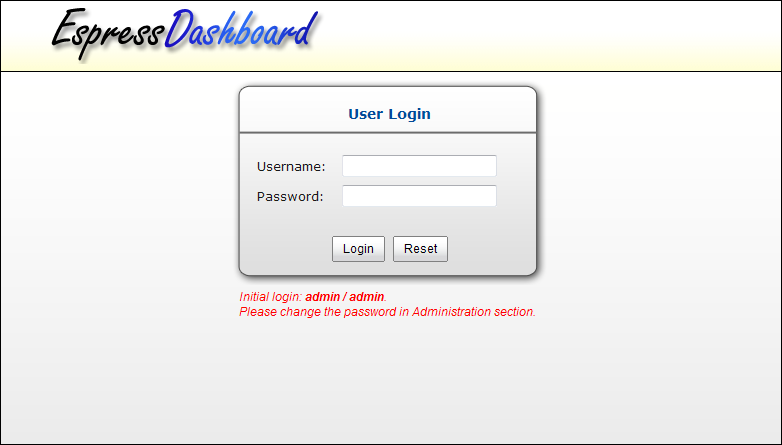
EDAB Server Started
Now you need to login before continuing.
With the server running, login as the system administrator in the panel on the right-hand side of the Start page. The default login for the administrator is username: admin and password: admin. Once you have logged in, the Start page will show up.

Admin logged into Start Page
To launch the Admin Console, click the button in the upper right-hand side of the Start page.
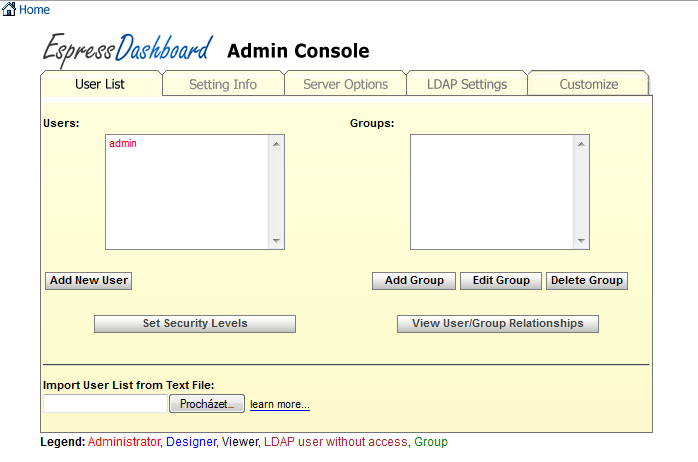
Admin Console
The Admin Console opens to the User List tab. By default the administrator is the only defined user. To add a new user to the system, click the button. This will open a new window, allowing you to add information for the user.

Add User Dialog
Enter details for this new user, making sure to assign Designer as the primary role. Please note that if you assign Viewer as the primary role, you will not have access to the core design/development tools, like Chart Designer, Quick Designer, and Organizer. For more information about creating users, please visit Section 1.4.1.1 - User List.
After you have finished, click . The dialog will close and the new user will be added to the user list in the Admin Console.
Now that you have entered the new user, return to Start page by clicking the icon in the upper left-hand side of the Admin Console.
With admin still logged in, let's do one more thing that will facilitate some of the exercises later. Click Organizer in the panel on the left. Then click the button ![]() . You will see a dialog box popped up. Highlight
. You will see a dialog box popped up. Highlight Sample.xml and click on the button on the lower right of the dialog box.

Data Registry List
A new dialog (Set Data Registry Permission) will show up. Click on . Then click on the User tab in yet another dialog. Highlight the user name that you just added and click .

Add Data Registry Privilege
Then check the Write and Read check boxes in the Set Data Registry Permission dialog. Click the button to close the dialog.
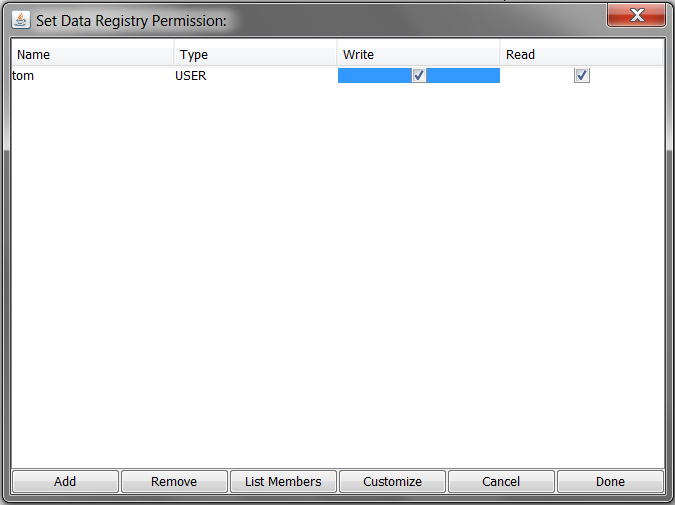
Data Registry Read Write Privilege
Close the Organizer or click the link. You should now be at the Start Page.
In the Start page, click the button. This will log the administrator out of the system.
Now log in again using the user that you created in Section Q.2.1 - Create a User. After you login, notice that the administration functions are not available. To run Organizer, click Organizer in the panel on the left.
User logged to Start Page
Reports and charts in the Organizer are grouped into projects and folders. Here, we are going to create a new project in which we will add the reports and charts used in later sections of this guide. To add a new project, click the button on the toolbar. ![]() A new node will be added with the name new project or new project (2) if a node of that name already exists.
A new node will be added with the name new project or new project (2) if a node of that name already exists.
To edit the new project, right click on the new node and select Edit from the pop-up menu. This will bring up a dialog allowing you to re-name the project as well as to specify a description.
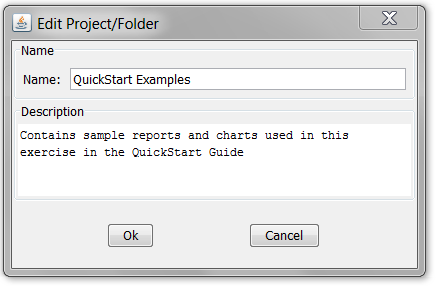
Edit Project Dialog
Specify a new name and description for the project and click . The changes will be applied. When you select the project in Organizer, you will see the description in the lower right-hand frame.
If you do not have the Organizer open, open it. Then select your project in the left-hand side. Next, click the button on the toolbar. ![]() a new dialog allowing you to select a file to insert into the Organizer.
a new dialog allowing you to select a file to insert into the Organizer.

Insert File Dialog
In the dialog, click the button, and navigate to help/quickstart/templates/ and select QuickStart42.tpl. The display name and corresponding URL should be automatically filled. Click to add the chart. The dialog will close and you will see an entry in the Organizer for the newly added chart.